"Red" the modern Red Hat Lady pattern by Arley Berryhill
"Buffy" The Whatever doll pattern by Judi Ward
"Verna" same pattern as Buffy
"Helena", Prince William, baby doll pattern by Judy Ward
This is my blog that will show some of the work I do. Wall art - Art Dolls - and many other things.
Sunday, April 29, 2012
Positioning the Legs for Doll making
Positioning the Leg for Doll Making
The materials we will need are as follows:
1- Doll pattern
2- Stuffing tools
3- Stuffing fibers
4- Quilting thread the color of body fabric.
5- Quilting needle
6- Curved needle ( I use a beading needle that is curved)
7- sewing machine
To begin with sew the legs as instructed on the pattern leaving the top curve open. Always back stitch at the beginning and end of your work this will make the stuffing more enjoyable.
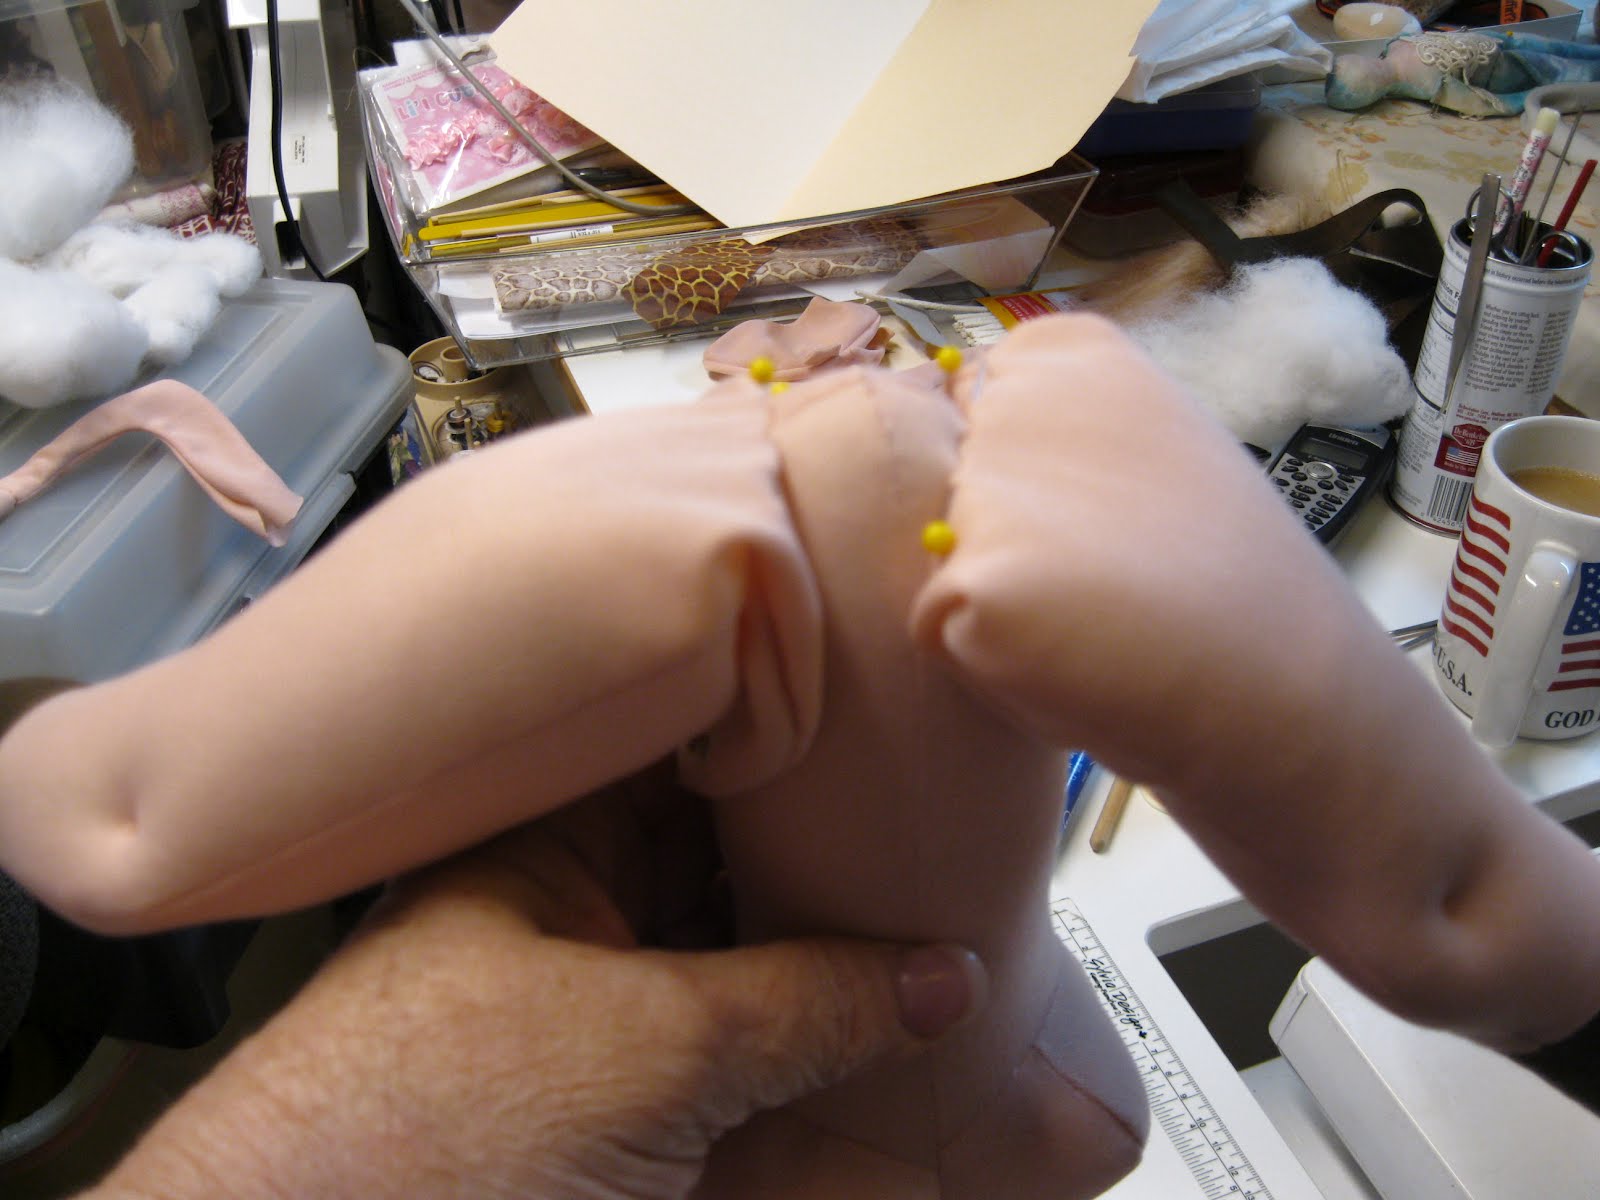
Stuff the leg to just above the knee. Then pin where the top of the leg meets the hip.
If you are going to have one leg higher than the other you will need to pin it in that position at this time.
This both views of the positioning.
Turn your doll upside down at this point. This will make sewing the crotch easier. As you can see sewing the leg a small distance from the center will position them the right space apart.
Note the space between the legs. Now you sew the upper part of the leg to the body.
I fold back the leg to a V position and sew it to the body in the front. This will make the doll look more realistic.
Do the same on the back side this allows room for the added stuffing and a roundness of the back side.
This makes a nice shapely hip and back side for the doll. I am using Arley Berryhill's LeFemme doll.
I pin the leg into position before sewing it down this helps to keep the proper shape on the leg.
The back view.
I sew this point with a beading curved needle it is nice for getting into tight spots.
Now you will finish stuffing the legs and sew them up from the back.
Sewing on the arms id much the same way.
Monday, April 23, 2012
Making a wig for your baby doll from Fake fur
This is for those of you that make baby dolls or even art dolls. The instructions will work on any doll and any fur with hair on it.
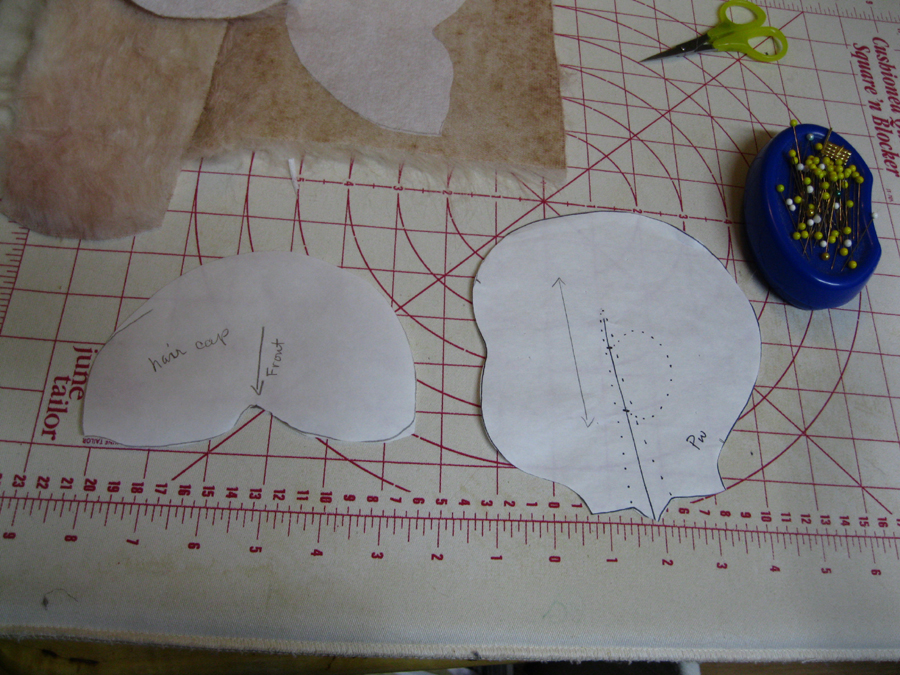
To begin with you will need the doll head pattern. I am using Judi Ward's "Prince William" pattern to make this wig from.
You can see that I have the face pattern piece and have taken a section from it from just above the brow and run it back to the back of the head. I traced this onto freezer paper so that it will be the same size as the dolls head.
As you can see the piece fits the original doll head-face pattern.
Next I trace out a side piece the same size of the doll head. I made a upside-down U shape over the ear as it was marked on the original patter.
I made this to fit the head for a short hair cut as this is a baby doll. If you want adult hair bring it to the nape of the neck.
At this point I have cut the new pattern out of iron-on inner facing fabric and I ironed that to the fake fur. This fur was hand dyed with Ritz liquid dye. ( red-yellow-tan ) Now it is cut out close to the weave of the fake fur. Be careful to only cut the knit of the fabric and not the hair part. When cutting the piece make sure that you mark the front of the face piece so that you can iron it to the fabric that has the length when cut extended past the knit. The sides are cut with the ear considered the long side. When cutting any knit the facing will avoid the problems of the stretch of the fabric.
Once the 3 pieces are cut out you begin pinning them together. Always make sure all the fur is tucked in the seam. I make the seam just under the original seam of the doll head so it cam be slipped onto the head when it is sewn. I also mark the front of the piece this makes matching the right sides together to the center piece.
One side has a F in the front and the other has a B in the back of the head for the wig.
Now you are ready to sew it. The shape of the wig is all in how you design it for each doll.
Have fun with your new doll wig.
Sunday, April 22, 2012
Needle Sculpted flat faced doll
Supplies:
double stretch fabric (doe swede)
acrylic paints
iron-on interfacing
small pompoms
med pompom
batting
When making a baby doll or any flat faced doll I have always had a problem with the flat face. I have discovered how to have a needle sculpted face on a flat faced doll.
Here we have the beginnings of a flat faced doll. Some call this a baseball head.
What I have done is to take 2 small pompoms and a med. pompom and glue them together in the shape of a natural nose. Then I placed batting above this and glued these to the back side of the face fabric. Note: I use fabric glue for this and very little of that.
When you turn the fabric back over to the right side note where the nose is aligned. I glued it so that I could roll it up or down while needle sculpting the face once it is put together and stuffed. As you can see I also painted the basics of the face while it was flat. This makes painting the face much easier.
At this point I place iron-on interfacing on the back side of the face piece. This will stabilize the face as well as allow you to sculpt the nose without loosing the shape in the overall stuffing of the head.
Iron facing to back of face allowing the area for the nose to be free from adhering to the lining. I iron 1" out from the pompoms and batting.
I use hot iron and press not iron the facing onto the face.
Press the facing to the side pieces before sewing them together. The facing will be offset a bit when ironed on so I trim it to the shape of the face piece.
Now the head is ready to sew together and stuff.
Friday, March 09, 2012
Hexagons, Diamonds and the Y seam

Managing those nasty Y seams can be much easier than they may seem. The follow is a good way to master it. I created this pattern just to show how it can be done. The pattern is called Hexagon Star
I would like to take the ouch out of those nasty Y seams.
To begin with you sew the two diamonds together on the side seams, leaving 1/4" at the beginning and end of your seam. Then press the seam to one side.
Always press seams in same direction at this time.
Image #1
Next step is to connect the hexagon to the 2 diamond pieces. I always use a quilting pencil and mark the 1/4" seam on the hexagon and diamonds. This helps you begin and end the seams in the right spot. This takes more time but will be much better in the long run.
Sew across the bottom of the first diamond piece.
Image #2
Now we begin a Y seam. Now sew across the bottom of the 2nd diamond piece.
This is where you press the pieces in one direction to form a 3 sided center. When you press the seams in one direction it should fall open as in image #3.
Continue sewing Diamonds onto the hexagon until you have reached the first diamond. Sew that last diamond to the first one.

Image #4
Adding the triangles. This is where the true Y seam comes in.
Again mark all pieces at the 1/4" seam to help locate where to begin and end your seams.
Image #5
Begin at the inside point and sew to the outside in both directions making sure you are leaving that 1/4" before sewing. Press flat and you will see that same 3 sided center lay in place.
Because you are sewing on the bias you will have some give as you sew. If you sew from the inside out you can fudge a bit to make that point.
Image #6

Step 6
Go ahead and have fun mastering the Y seam with Hexagons and Diamonds.
Contact me for pattern if you want it.
$ 5.00

This is a crib size quilt.
Monday, July 25, 2011
Monday, July 04, 2011

I have been working on a necklace for Betty. This is a fringe beaded necklace. I have been looking for a nice distraction that was limited in space for the supplies and love making jewelry so picked it back up. When I was very young in the 1970s I made quite a bit of it. I have now discovered the wonderful new creations by others and several nice books.
Friday, June 03, 2011
Subscribe to:
Posts (Atom)